Creating Stunning Presentations with Google Slides: A Beginner-Friendly Guide
Master the art of creating professional presentations in the cloud
I've been creating presentations for years, and Google Slides has become my go-to tool for its simplicity and powerful collaboration features. In this guide, I'll walk you through everything you need to know to create impressive presentations that engage your audience—from basic setup to advanced techniques that will make your slides stand out.
Understanding Google Slides Basics
When I first started creating presentations online, I quickly learned that Google's presentation tool isn't actually called "Google PowerPoint" as many people mistakenly refer to it. It's called Google Slides, and it's Google's free, cloud-based alternative to Microsoft PowerPoint.
As part of the Google Workspace suite (formerly G Suite), Google Slides offers several key advantages:
- Cloud-based storage with automatic saving
- Real-time collaboration with team members
- Accessibility from any device with internet connection
- No software installation required—everything works in your browser
- Seamless integration with other Google services like Docs and Sheets
Unlike traditional presentation software, Google Slides automatically saves your work as you go, eliminating the worry of losing your progress. I've found this feature particularly helpful when working on important presentations—no more panic moments from unexpected crashes or power outages!
Getting Started with Your First Presentation
Creating your first Google Slides presentation is straightforward. I'll walk you through the process step by step:
Step-by-Step Process
- Access Google Slides: Navigate to slides.google.com or access through Google Drive by clicking "New" > "Google Slides"
- Sign in: Use your Google account credentials (create one if you don't have it)
- Create a new presentation: Click on the colorful "+" icon for a blank presentation or choose from available templates
- Name your presentation: Click on "Untitled presentation" at the top and enter your desired title

Google Slides Creation Process
The following diagram illustrates the process of creating a new Google Slides presentation:
flowchart TD
    A[Visit slides.google.com] --> B[Sign in to Google Account]
    B --> C{Choose Starting Point}
    C -->|Blank| D[Click colorful '+' icon]
    C -->|Template| E[Browse template gallery]
    D --> F[New blank presentation opens]
    E --> G[Select preferred template]
    G --> H[Template-based presentation opens]
    F --> I[Name your presentation]
    H --> I
    I --> J[Begin creating content]
As How-To Geek explains in their beginner's guide, once you've created your new presentation, it will automatically save to your Google Drive as you work. This means you can access it from any device by simply logging into your Google account.
I always recommend starting with a template if you're new to presentation design. Templates provide professional layouts and color schemes that make your presentation look polished with minimal effort. You can always customize these templates later as you become more comfortable with the platform.
Designing Your Presentation Structure
When I create presentations, I've learned that a well-structured slide deck is crucial for effectively communicating your message. Google Slides offers several tools to help organize your presentation:

Key Structural Elements
- Slide Navigator: Located on the left side, this panel displays thumbnails of all your slides for easy navigation and rearrangement.
- Adding New Slides: Click the "+" button in the toolbar or use the keyboard shortcut Ctrl+M (Cmd+M on Mac).
- Slide Layouts: When adding a new slide, you can choose from various layouts based on your content needs (title slide, content with bullets, two columns, etc.).
- Sections: For longer presentations, use the "Section" feature (right-click in the slide navigator) to group related slides together.
Pro Tip
When I'm struggling with organizing my presentation content, I use Google Doc presentation planning first. I outline my key points in a Google Doc, then use PageOn.ai's AI Blocks feature to transform that outline into structured content sections that I can easily transfer to Google Slides.
Recommended Slide Distribution
Based on my experience, here's an optimal slide distribution for a typical 15-minute presentation:
I always make sure my presentations follow a logical flow with a clear introduction, body, and conclusion. For complex topics, I break the content into manageable sections and use consistent visual cues to help my audience follow along. When I'm facing writer's block, PowerPoint presentations can be converted to Google Slides format for inspiration.
Enhancing Visual Appeal and Engagement
In my experience, visually appealing presentations are far more effective at engaging audiences and conveying information. Google Slides offers numerous tools to enhance the visual appeal of your presentations:
Themes and Design
- Apply themes via "Slide" → "Change theme"
- Customize colors through "Slide" → "Edit master"
- Maintain consistent fonts throughout
- Use complementary color schemes
Visual Elements
- Insert high-quality images and icons
- Add videos to demonstrate concepts
- Create charts to visualize data
- Use SmartArt-like diagrams
Design Principles for Effective Slides
These design principles help create visually appealing and effective presentations:
flowchart TD
    A[Visual Design Principles] --> B[Contrast]
    A --> C[Repetition]
    A --> D[Alignment]
    A --> E[Proximity]
    B --> B1[Use contrasting colors\nfor text & background]
    C --> C1[Repeat design elements\nfor consistency]
    D --> D1[Align elements to create\norder & organization]
    E --> E1[Group related items\ntogether]
    B1 --> F[Engaging\nPresentation]
    C1 --> F
    D1 --> F
    E1 --> F
PageOn.ai Integration
When I need to find the perfect visuals for my presentations, I use PageOn.ai's Deep Search feature. It helps me discover and integrate relevant images without disrupting my workflow. This tool has saved me countless hours of searching for the right visuals to complement my content.
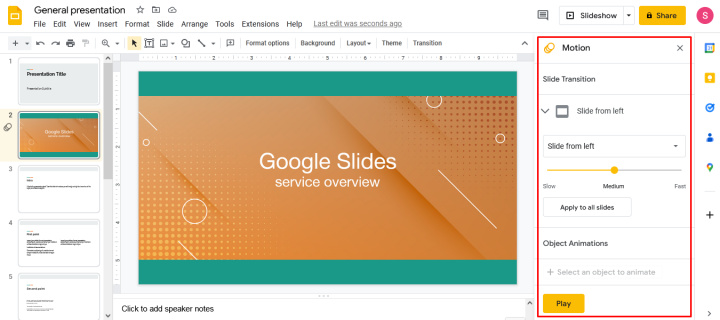
I've found that animations and transitions can add polish to a presentation when used sparingly. Google Slides offers various transition effects between slides and animation options for individual elements. To add these:
- Select a slide or object you want to animate
- Click "Slide" → "Transition" (for slide transitions) or "Insert" → "Animation" (for object animations)
- Choose your desired effect and speed
- Preview the animation to ensure it enhances rather than distracts
Remember, when it comes to visual design in presentations, less is often more. I always aim for clean, uncluttered slides that focus the audience's attention on my key messages rather than overwhelming them with excessive design elements. If you're looking to transform PowerPoint into Google Slides, you'll want to ensure your visual elements maintain their quality during the conversion.
Adding and Formatting Content Effectively
Creating clear, concise, and well-formatted content is essential for an effective presentation. Here's how I approach content creation in Google Slides:

Text Formatting Essentials
Adding Text
- Click "Insert" → "Text box" or use a slide layout with text placeholders
- Type or paste your content
- Resize text boxes by dragging the corners
- Reposition by clicking and dragging
Formatting Options
- Change font, size, and color using the toolbar
- Apply bold, italic, or underline for emphasis
- Adjust line spacing and alignment
- Create bulleted or numbered lists
Text Readability Factors
Based on presentation design research, these factors influence how easily your audience can read your slides:
Visual Content Elements
Beyond text, I enhance my presentations with various visual elements:
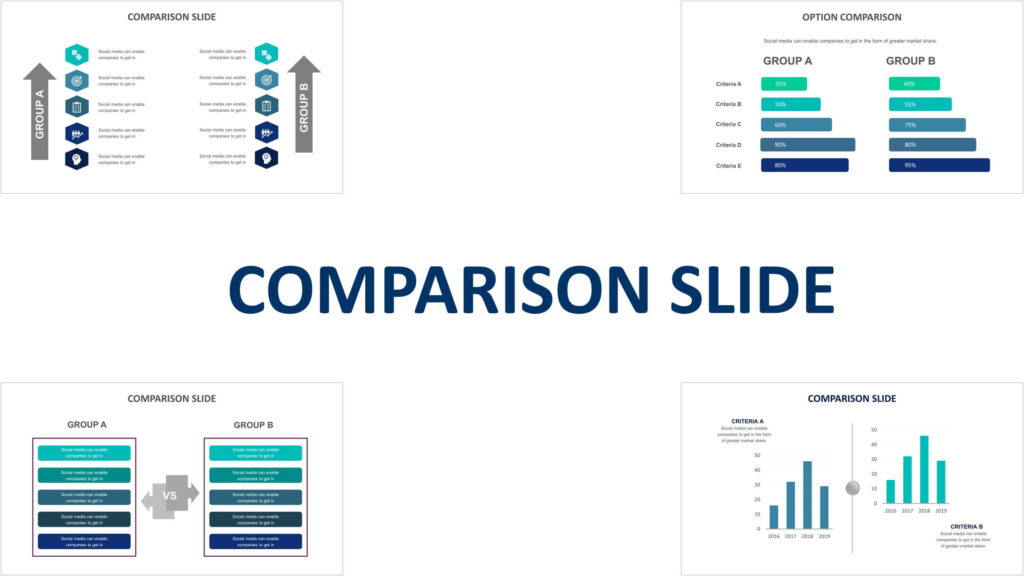
Tables
Insert via "Insert" → "Table" to organize and compare data in rows and columns.
Charts
Add via "Insert" → "Chart" to visualize numerical data as bar, line, pie charts, etc.
Diagrams
Create using shapes and connectors to illustrate processes, hierarchies, or relationships.
Content Transformation with PageOn.ai
When I'm working with complex information, I use PageOn.ai to transform my rough notes into polished, visually structured content blocks. This helps me organize information hierarchically and create clear visual relationships between concepts, making my presentations more impactful and easier to understand.
I always follow the "less is more" principle when adding content to slides. For optimal readability, I limit each slide to one main idea with 3-5 supporting points and use the 6x6 rule: no more than 6 bullet points per slide and no more than 6 words per bullet point. If you're working with powerpoint presentation with google docs, these same principles apply when transferring content between platforms.
Collaboration and Sharing Features
One of the most powerful aspects of Google Slides that I've come to appreciate is its robust collaboration capabilities. These features make it incredibly easy to work with team members regardless of their location:

Sharing Your Presentation
To share your presentation with others:
- Click the blue "Share" button in the top-right corner
- Enter email addresses of people you want to share with
- Set appropriate permissions:
- Viewer: Can only view the presentation
- Commenter: Can view and add comments
- Editor: Can make changes to the presentation
- Optionally add a personalized message
- Click "Send" to notify recipients
Collaboration Workflow
This diagram illustrates the typical collaboration workflow in Google Slides:
flowchart TD
    A[Create Presentation] --> B[Share with Collaborators]
    B --> C[Set Permission Levels]
    C --> D{Real-time Collaboration}
    D --> E[Add Comments]
    D --> F[Make Edits]
    D --> G[Suggest Changes]
    E --> H[Resolve Comments]
    F --> I[Track Changes in Version History]
    G --> J[Accept/Reject Suggestions]
    H --> K[Finalize Presentation]
    I --> K
    J --> K
Real-time Collaboration Features
Comments and Feedback
- Add comments by selecting text/objects and clicking the comment icon
- Tag specific team members using @ mentions
- Reply to existing comments to create threads
- Resolve comments once addressed
Version History
- Access via "File" → "Version history" → "See version history"
- View who made specific changes and when
- Name important versions for easy reference
- Restore previous versions if needed
Pro Tip
When collaborating on presentations that originated in PowerPoint, I use the convert powerpoint to google slides feature to ensure seamless teamwork. This allows my team to leverage Google's collaboration tools while maintaining the original PowerPoint design elements.
I've found that the ability to collaborate in real-time has dramatically improved my team's productivity. We can work simultaneously on different slides, provide immediate feedback, and see changes as they happen. This eliminates the confusion of managing multiple versions and ensures everyone is always working with the most current content.
Presentation Delivery Options
When it's time to deliver your presentation, Google Slides offers several flexible options that I regularly use depending on the situation:
Presentation Modes
Standard Presentation Mode
- Click "Present" button in the top-right corner
- Displays full-screen presentation
- Navigate using arrow keys or on-screen controls
- Press "Esc" to exit presentation mode
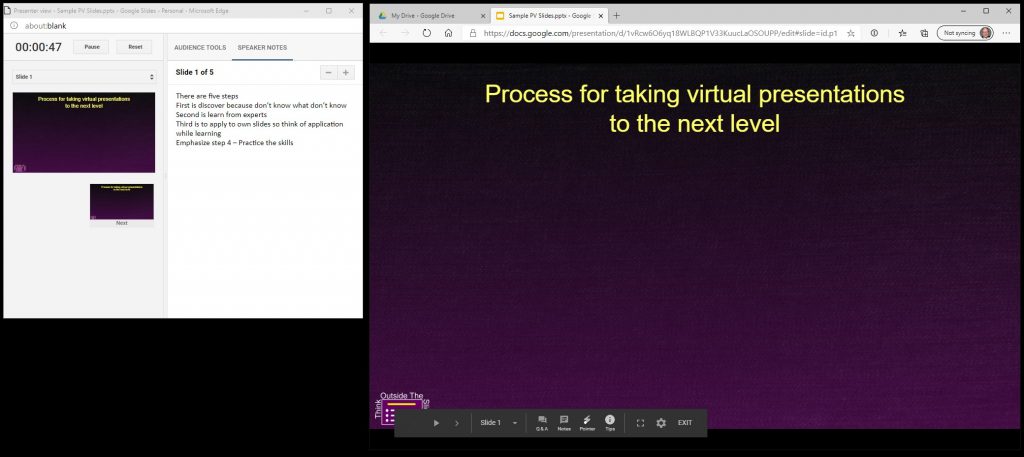
Presenter View
- Access via the dropdown arrow next to "Present"
- Shows current slide, notes, and upcoming slide
- Displays timer to track presentation length
- Only visible to the presenter (audience sees standard view)
Keyboard Shortcuts for Presenting
| Action | Windows/Chrome OS | Mac |
|---|---|---|
| Next slide | N, Page Down, Right Arrow, Down Arrow, Space | Same as Windows |
| Previous slide | P, Page Up, Left Arrow, Up Arrow, Backspace | Same as Windows |
| First slide | Home | Home or Fn + Left Arrow |
| Last slide | End | End or Fn + Right Arrow |
| Toggle laser pointer | L | L |
Sharing and Exporting Options
I often need to share my presentations in different formats depending on the audience and context:
- Present remotely: Use "Present to a meeting" to share directly in Google Meet
- Share link: Create a view-only link via the Share button to distribute via email or messaging
- Export formats: Use "File" → "Download" to save as:
- Microsoft PowerPoint (.pptx)
- PDF Document (.pdf)
- Plain Text (.txt)
- Image files (.jpg, .png)
- Publish to web: Create an embeddable or standalone web page version via "File" → "Publish to the web"
PageOn.ai Integration
Before important presentations, I use PageOn.ai's presentation rehearsal assistant to practice my timing and transitions. This tool provides feedback on my pacing and helps me identify areas where I might need to adjust my content or delivery style for maximum impact.
I've found that practicing with the actual presentation mode is essential before delivering to an audience. This helps me get comfortable with the flow, timing, and any interactive elements I've included. For important presentations, I always have a backup plan—downloading a PDF version ensures I can present even if internet connectivity is unreliable.
Advanced Tips and Techniques
After years of creating presentations, I've discovered several advanced techniques that help me work more efficiently and create more impactful slides:
.jpg)
Keyboard Shortcuts for Efficiency
Text Formatting
- Ctrl+B: Bold
- Ctrl+I: Italic
- Ctrl+U: Underline
- Ctrl+Shift+V: Paste without formatting
Slide Management
- Ctrl+M: New slide
- Ctrl+D: Duplicate slide
- Ctrl+Up/Down: Rearrange slides
- Alt+Shift+1-9: Apply heading styles
General Actions
- Ctrl+Z/Y: Undo/Redo
- Ctrl+F: Find
- Ctrl+S: Save (though auto-save is on)
- Alt+F11: Formula bar
Time Savings with Advanced Techniques
Based on my experience, here's how much time these advanced techniques can save in the presentation creation process:
Advanced Features Worth Mastering
Custom Templates
Create your own templates to maintain brand consistency:
- Design your slide layouts as desired
- Go to "Slide" → "Edit master"
- Customize layouts, colors, and fonts
- Save as a template via "File" → "Save as template"
Embedding External Content
Enhance your presentations with dynamic content:
- YouTube videos: "Insert" → "Video"
- Google Sheets charts: "Insert" → "Chart" → "From Sheets"
- Web content: "Insert" → "By URL" (with add-ons)
- Google Maps: Using the Explore tool
Visualization with PageOn.ai
For complex presentations, I rely on PageOn.ai to transform abstract ideas into clear visual hierarchies and relationships. The tool helps me create professional diagrams and visualizations that would otherwise take hours to design manually, allowing me to focus on content quality rather than struggling with design elements.
Using the Research Tool
One of my favorite advanced features is the Research tool, which allows me to search for information without leaving Google Slides:
- Open the Research tool by clicking "Tools" → "Explore" or pressing Ctrl+Alt+Shift+I
- Search for information, images, or other Google Slides presentations
- Drag and drop content directly from the Research panel into your slides
- Citations are automatically generated when you insert content
These advanced techniques have dramatically improved my presentation workflow. I especially appreciate the ability to create custom templates for consistent branding across all my presentations. When working with complex data visualizations, I often create them in Google Sheets first, then import them into Slides to maintain live data connections that update automatically when my source data changes.
Troubleshooting Common Issues
Even with Google Slides' user-friendly interface, I've encountered various challenges over the years. Here are solutions to some common issues you might face:

Common Issues and Solutions
This flowchart helps diagnose and resolve typical Google Slides problems:
flowchart TD
    A[Problem Identified] --> B{What type of issue?}
    B -->|Formatting| C[Formatting Issues]
    B -->|Access| D[Access Issues]
    B -->|Content| E[Content Issues]
    B -->|Performance| F[Performance Issues]
    C --> C1[Font/Layout Inconsistencies]
    C1 --> C1a[Use Google Fonts only\nAvoid custom fonts]
    C --> C2[Image Quality Problems]
    C2 --> C2a[Upload high-resolution images\nAvoid stretching small images]
    D --> D1[Offline Access Needed]
    D1 --> D1a[Enable offline access in\nDrive settings before going offline]
    D --> D2[Sharing Permission Problems]
    D2 --> D2a[Check sharing settings\nVerify email addresses]
    E --> E1[Lost Content/Changes]
    E1 --> E1a[Check Version History\nRestore previous versions]
    E --> E2[Format Conversion Issues]
    E2 --> E2a[Use File > Download as\nfor proper format conversion]
    F --> F1[Slides Running Slowly]
    F1 --> F1a[Reduce high-res images\nLimit animations\nClear browser cache]
Detailed Solutions for Common Problems
Formatting Inconsistencies
When your presentation looks different across devices:
- Stick to Google Fonts rather than custom fonts
- Check if images are properly embedded
- Use "View" → "Master" to enforce consistent styling
- Test on different devices before important presentations
Offline Access
To work without internet connection:
- Enable offline access in Google Drive settings
- Install Google Docs Offline Chrome extension
- Open files while online first to sync them
- Remember that some features won't work offline
Image Resolution Issues
To maintain high-quality images:
- Use high-resolution images (1920×1080 or higher)
- Avoid stretching small images to fit large spaces
- Compress large images before uploading
- Use "Format options" → "Adjustments" to enhance images
Converting Between Formats
When moving between PowerPoint and Google Slides:
- Use "File" → "Download as" → "Microsoft PowerPoint"
- Check for font substitutions and formatting changes
- Simplify complex animations before conversion
- Verify all slides after conversion for inconsistencies
Format Conversion Assistance
When dealing with format conversion challenges, I use PageOn.ai's intelligent formatting tools to maintain visual consistency. The platform helps identify and fix formatting issues that typically occur when converting between PowerPoint and Google Slides, ensuring my presentations maintain their professional appearance regardless of the platform.
Recovering Lost Content
If you ever lose content or need to restore a previous version:
- Go to "File" → "Version history" → "See version history"
- Browse through the timestamps on the right panel
- Click on a version to preview it
- Select "Restore this version" to revert to that point
- Alternatively, copy specific elements from an old version to your current version
Through troubleshooting these common issues, I've become much more efficient with Google Slides. I now proactively prepare for potential problems by enabling offline access before travel, using Google Fonts exclusively for important presentations, and always keeping a backup in PDF format for crucial presentations. These practices have saved me from many stressful situations!
Transform Your Visual Expressions with PageOn.ai
Take your Google Slides presentations to the next level with AI-powered visualization tools that turn complex ideas into clear, compelling visuals—no design skills required.
Start Creating with PageOn.ai TodayFinal Thoughts
Google Slides has revolutionized how we create and share presentations. Its combination of accessibility, collaboration features, and powerful design tools makes it an excellent choice for everyone from students to business professionals.
Throughout my journey with presentation creation, I've learned that the most effective slides focus on clarity and visual impact rather than flashy effects. By mastering the techniques covered in this guide, you'll be well-equipped to create presentations that engage your audience and effectively communicate your message.
Remember that great presentations aren't just about the tool you use—they're about telling a compelling story. Google Slides provides the canvas, but your ideas and organization are what truly make a presentation memorable.
For those times when you need additional support transforming complex ideas into clear visual expressions, tools like PageOn.ai can be invaluable. They help bridge the gap between your expertise and design skills, ensuring your presentations not only contain great content but also present it in the most effective visual format possible.
You Might Also Like
Essential Elements Every Successful Startup Pitch Deck Must Include | PageOn.ai Guide
Discover the 9 essential elements every winning startup pitch deck needs, from compelling opening hooks to financial projections that captivate investors and secure funding.
The Art of Startup Storytelling: Creating Compelling Visual Investor Narratives
Transform your startup pitch with powerful visual storytelling techniques that captivate investors. Learn how to craft compelling narratives that convert complex ideas into funding opportunities.
Strategic Icon Selection Guide: Achieving Visual Consistency in Design Systems
Learn how to create visual harmony through intentional icon systems. Our comprehensive guide covers selection criteria, styling guidelines, and implementation strategies for cohesive design.
Optimizing AI Model Costs: Balancing Performance with Resource Requirements
Discover practical strategies for AI model cost optimization while maintaining high performance. Visual frameworks for balancing computational efficiency with powerful AI capabilities.